Your 2025 Guide to Lightning Lanes at Disney World: Tips for Moms
Planning a Disney World vacation is exciting, but if you’ve already started researching Lightning Lanes, you might be feeling a little overwhelmed. Between ride reservations, different park strategies, and making sure your kids get to experience the attractions at the top of their wish list, it can start to feel like planning a second full-time job.
That’s where I come in. As a Disney travel planner (and a mom myself), I’ve helped countless families cut through the confusion and make Lightning Lanes work for them, not against them.
In this post, I’ll walk you through everything you need to know about Lightning Lanes at Disney World in 2025—what they are, how they work, and the tips that will actually save your family time (and meltdowns) in the parks.
Lightning Lane 101 – The Basics You Need to Know
What is the Lightning Lane?
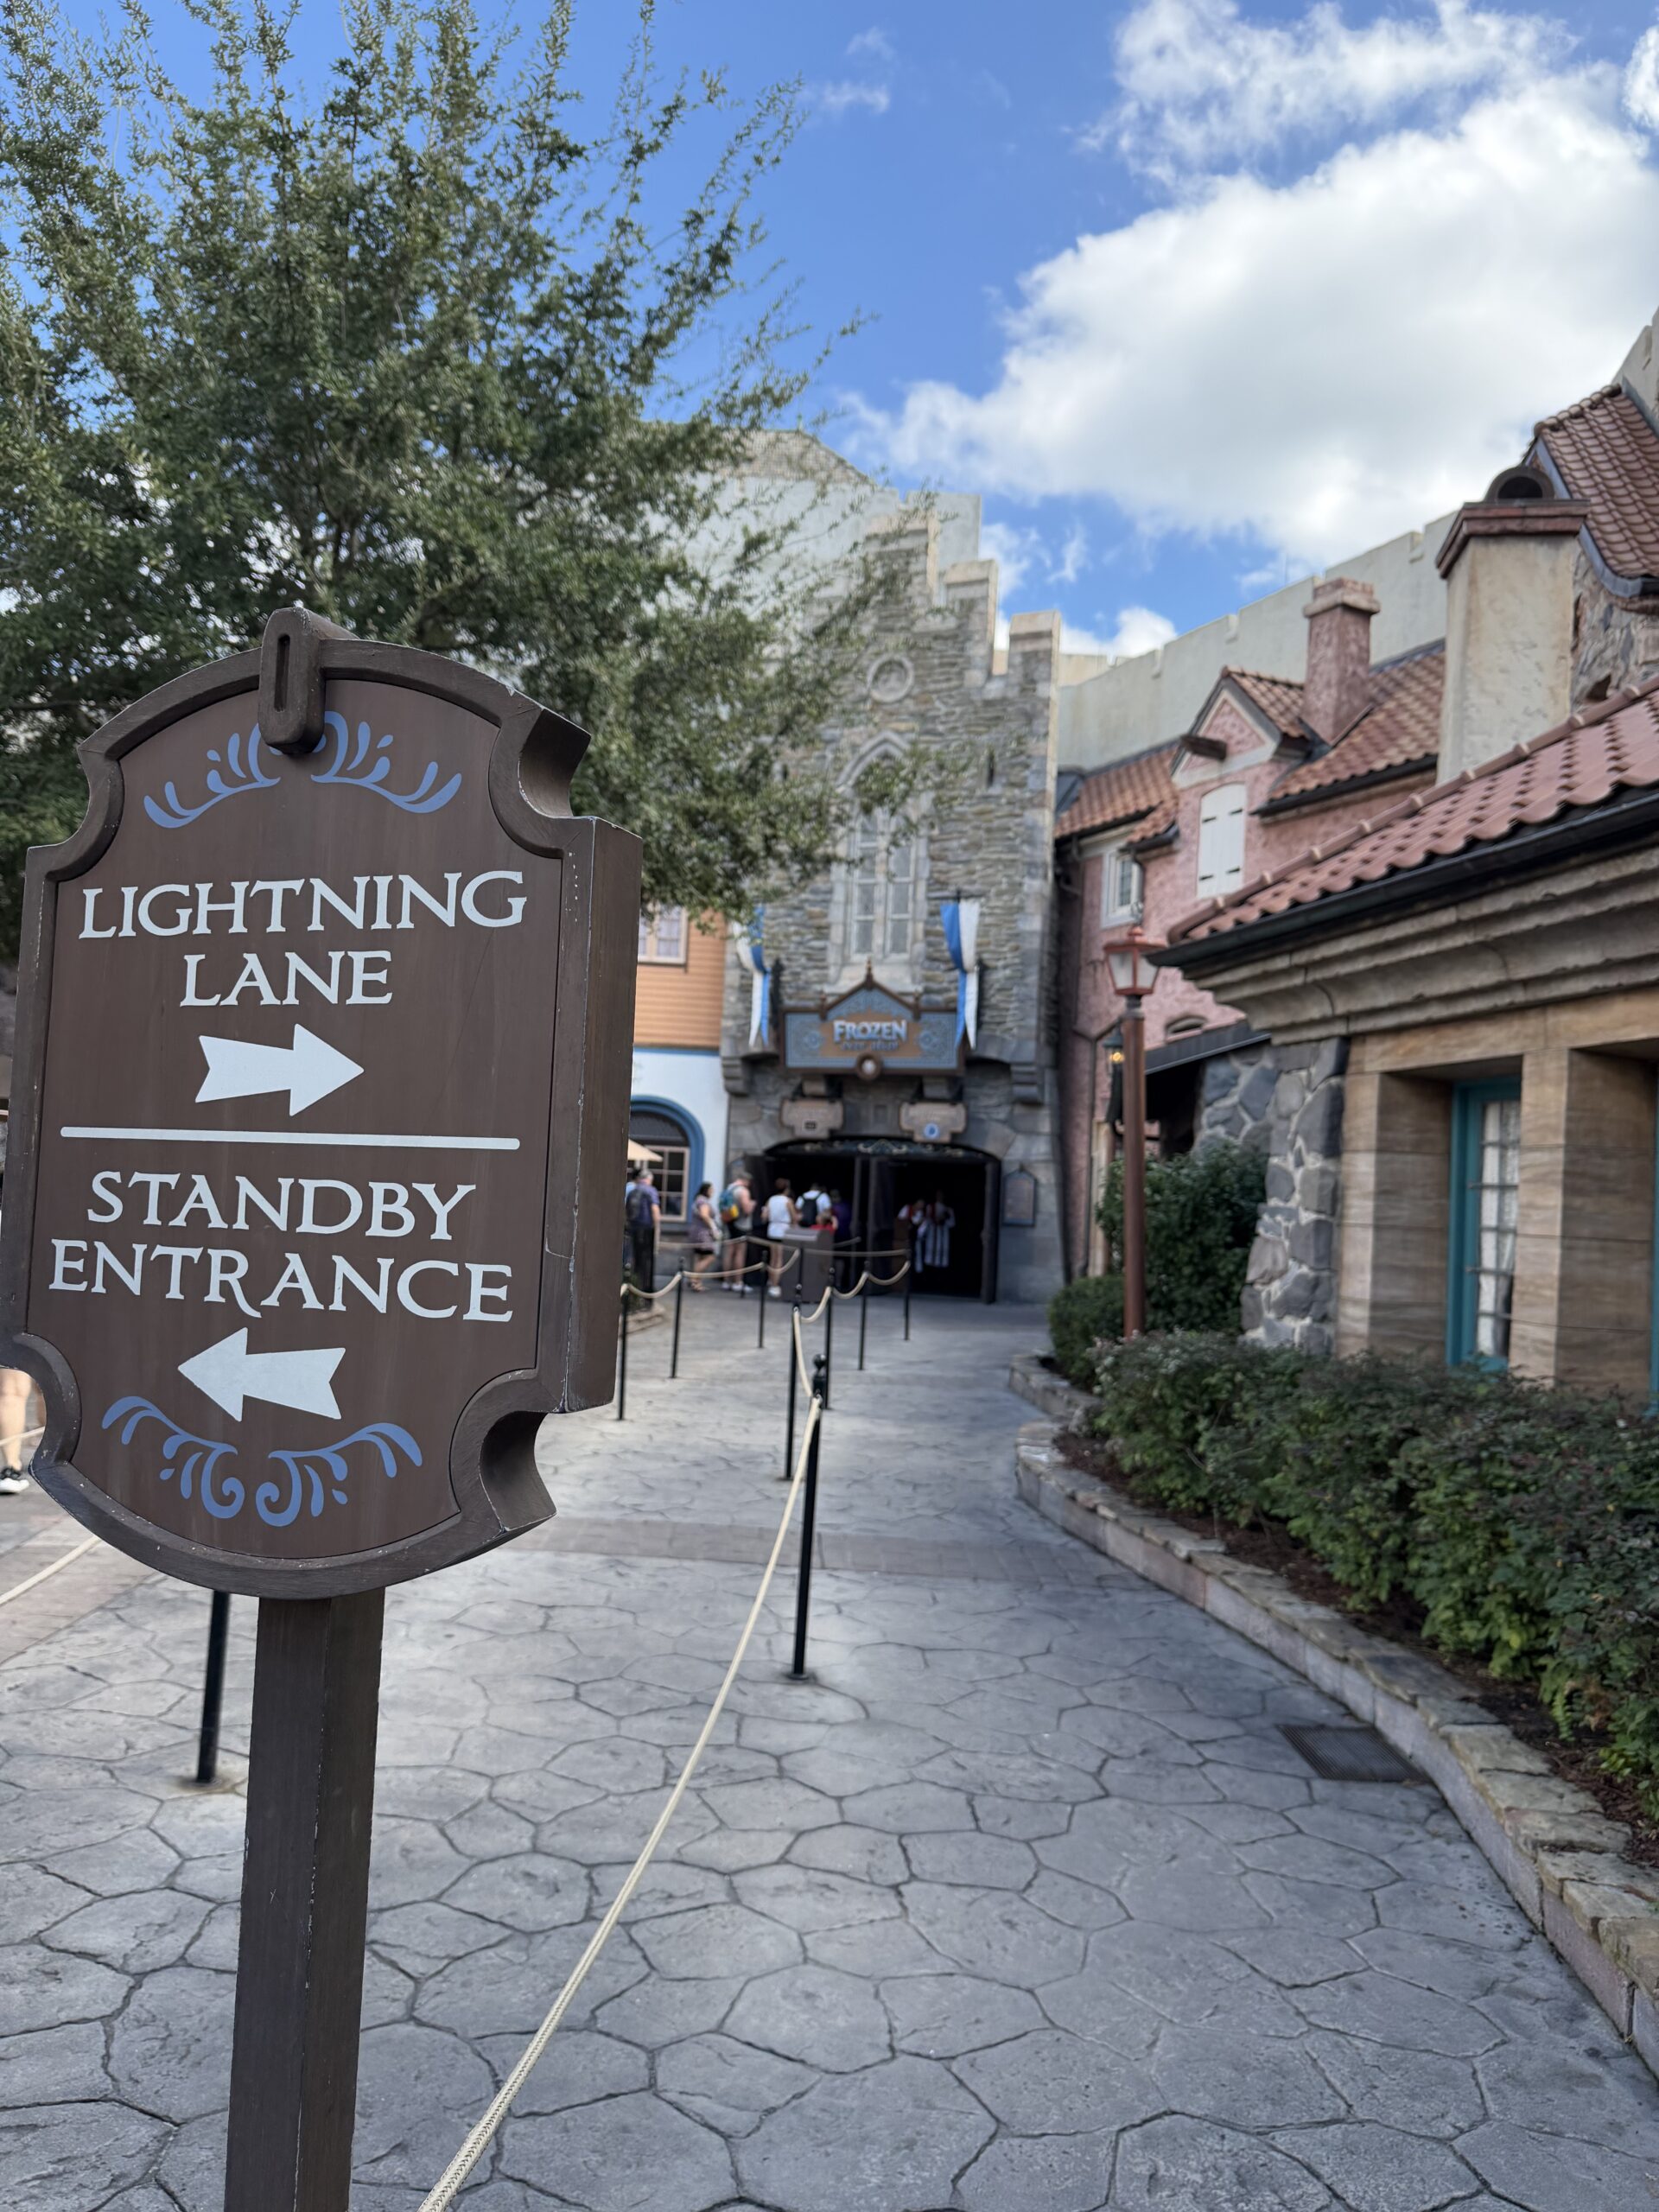
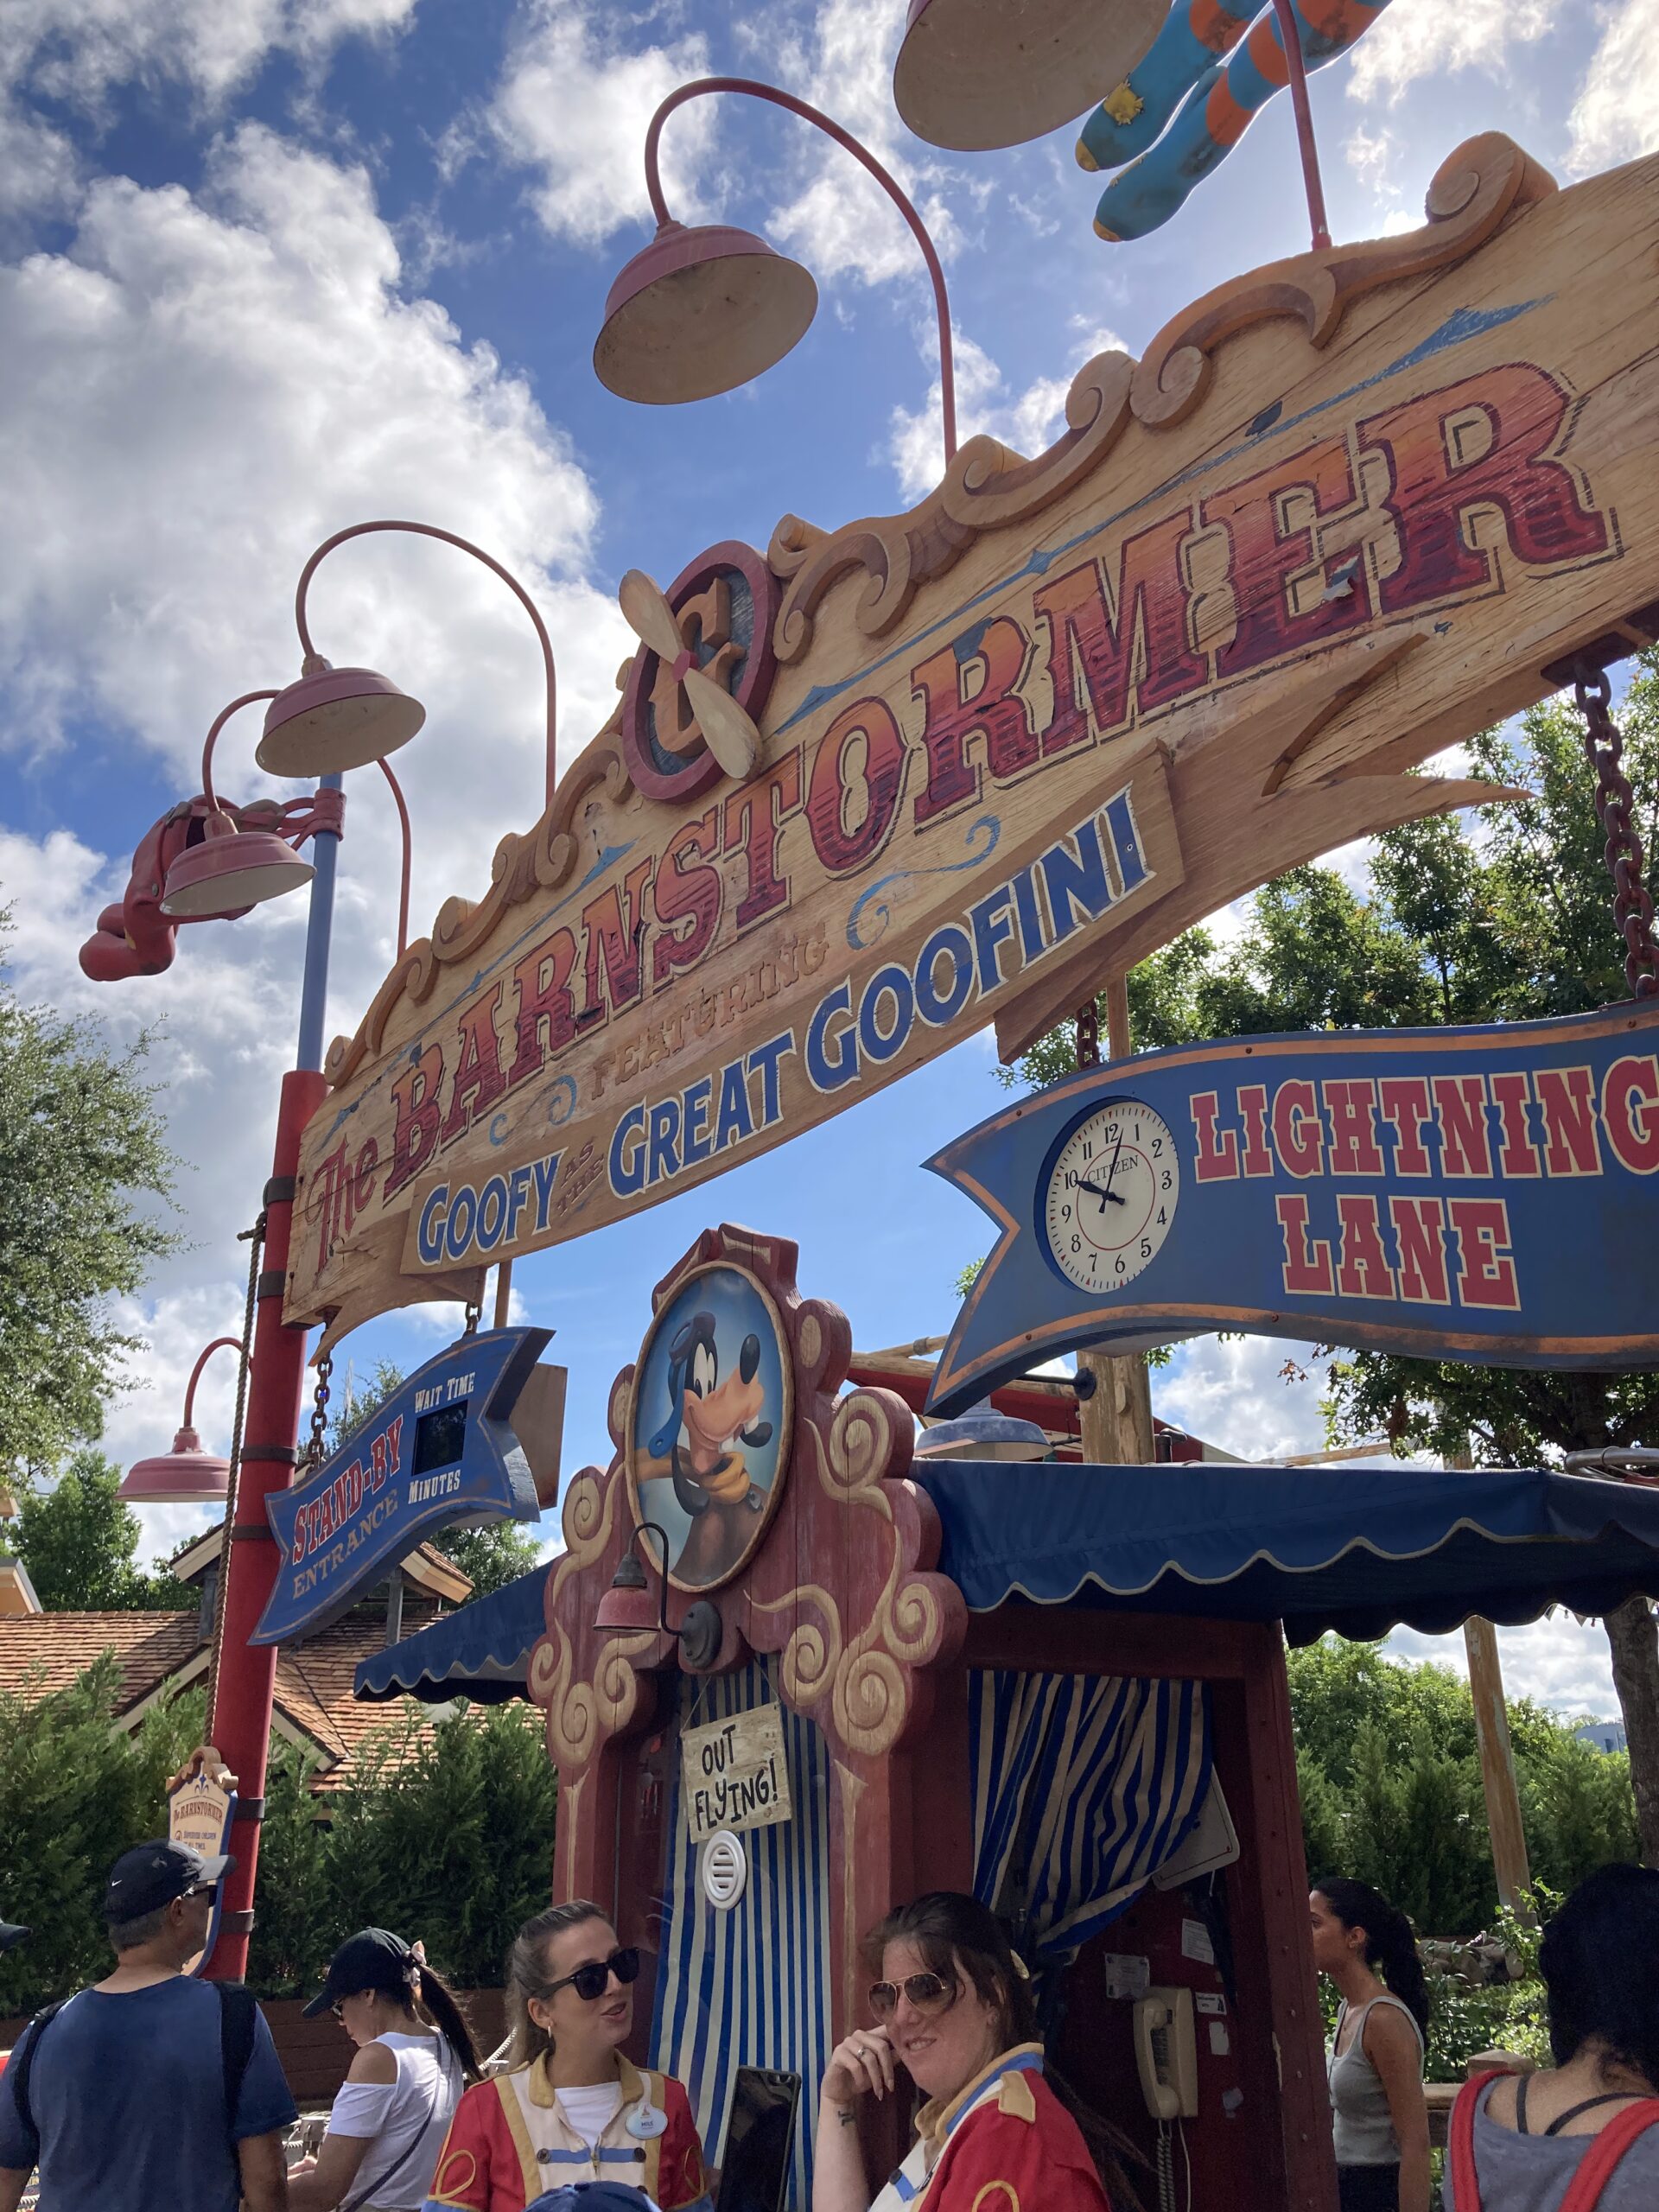
At Disney World, the Lightning Lane is the physical line you’ll enter at an attraction when it’s your scheduled return time. This special line lets you bypass the much longer standby line—which means less waiting, fewer meltdowns, and more time enjoying the magic. The Return Time is the one hour window Disney will assign for you to return to the attraction and use your Lightning Lane pass.
The Three Types of Lightning Lane Passes
Disney now offers three different ways to use Lightning Lanes:
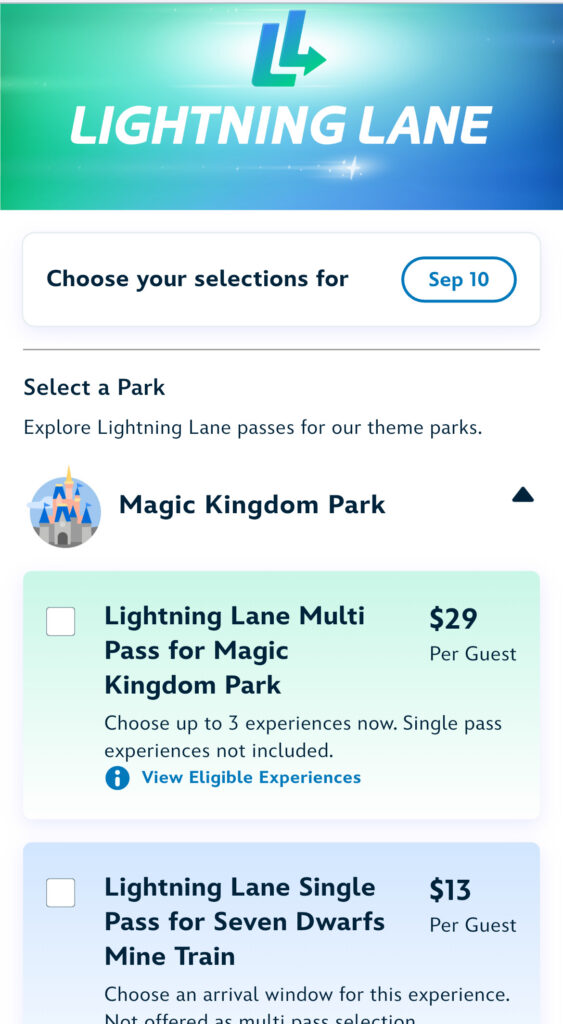
- Lightning Lane Multi Pass (Cost is around $28-30/day/person)
- Think of this as your “bundle deal.” You can pre-book 3 Lightning Lane selections per day, all at once. It works similarly to the old FastPass+ system, and it’s the best way to guarantee shorter waits at multiple rides each day.
- Once you are in the parks you can start booking more Lightning Lanes as you use your Lightning Lanes.
- Here is a list of all the rides included with Lightning Lane Multi Pass
- Lightning Lane Single Pass (Cost varies from $11-22/person/ride)
- This option allows you to purchase a Lightning Lane for one popular attraction at a time that isn’t included in the Lightning Lane Multi Pass.
- Rides currently included are: Flight of Passage, Rise of the Resistance, Seven Dwarves Mine Train, TRON, and Guardians of the Galaxy Cosmic Rewind.
- Lightning Lane Premier Pass (Cost starts at $189/person but expect a much higher price tag)
- This pass is for people who have the budget and do not want to deal with pre booking any Lightning Lanes before their trip or dealing with return times. Guests with a Premier Express Pass do not have to book any Lightning Lanes, instead they just walk up to a ride whenever they want and scan in through the Lightning Lane. All rides with a Lightning Lane are included but you can’t park hop.
Onsite vs. Offsite Booking Windows
One of the biggest advantages of staying at a Disney resort hotel is early access to booking:
- Onsite Guests → Can pre-book 3 Lightning Lane selections per day, starting 7 days before check-in (for up to 14 days of your trip).
- Offsite Guests → Can pre-book 3 selections per day, starting 3 days before the first day of ticket use.
This difference means onsite guests get a big head start on locking in the most popular rides.
Pro Mom Tip: If you want first dibs on those hot ticket attractions like Slinky Dog or Tiana’s Bayou Adventure, consider staying onsite so you have first access to the best return times and Lightning Lane availability.
How to Book Lightning Lanes (Step-by-step)
Booking a Lightning Lane is done right inside the My Disney Experience app—the same app you’ll use for park maps, mobile food orders, and checking wait times. Here’s what the process looks like:
Step 1: Open the My Disney Experience App
- Download the app before your trip and make sure your tickets and resort reservations are linked.
- Pro Tip: Double-check that everyone in your family is linked in your “Friends & Family” list so you can book for your whole group at once.

Step 2: Select Lightning Lane Pass Type
- Multi Pass → Preselect 3 Lightning Lane experiences per day.
- Single Pass → Purchase one Lightning Lane for a specific attraction.
- Magic Kingdom: TRON and Seven Dwarves Mine Train
- EPCOT: Guardians of the Galaxy Cosmic Rewind
- Animal Kingdom: Flight of Passage (I love this ride)
- Hollywood Studio: Rise of the Resistance
- Premier Pass → Let’s just call this the bougie pass!
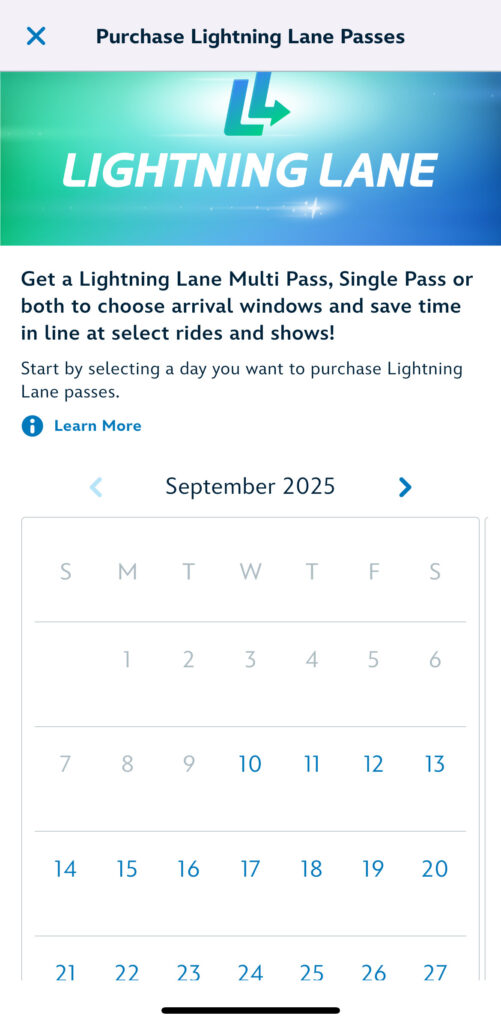
Step 3: Choose Your Attractions
- After you click purchase you’ll be brought to a screen with a calendar, select the date you are buying your Lightning Lanes for
- Next, select the park you are purchasing for
- If you are planning to park hop you need to purchase Lightning Lanes for the first park you are going to visit
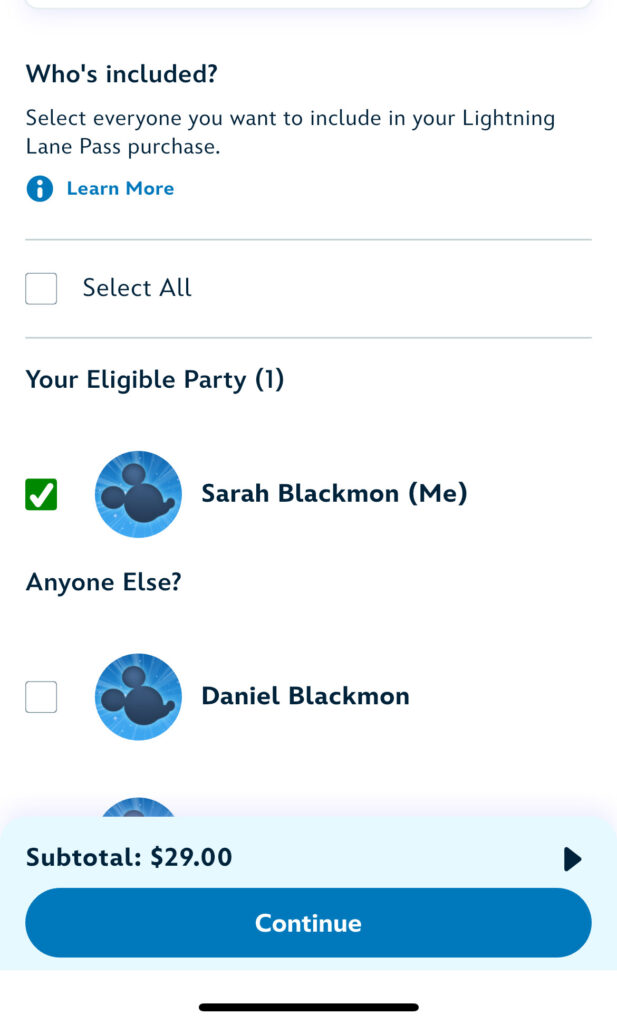
- Then select all the guests who will be purchasing Lightning Lanes
- Pro Tip: For the preselections you can’t change the guests, but once you use a Lightning Lane in the parks and are ready to book another ride, you can select or deselect who will be using that Lightning Lane.
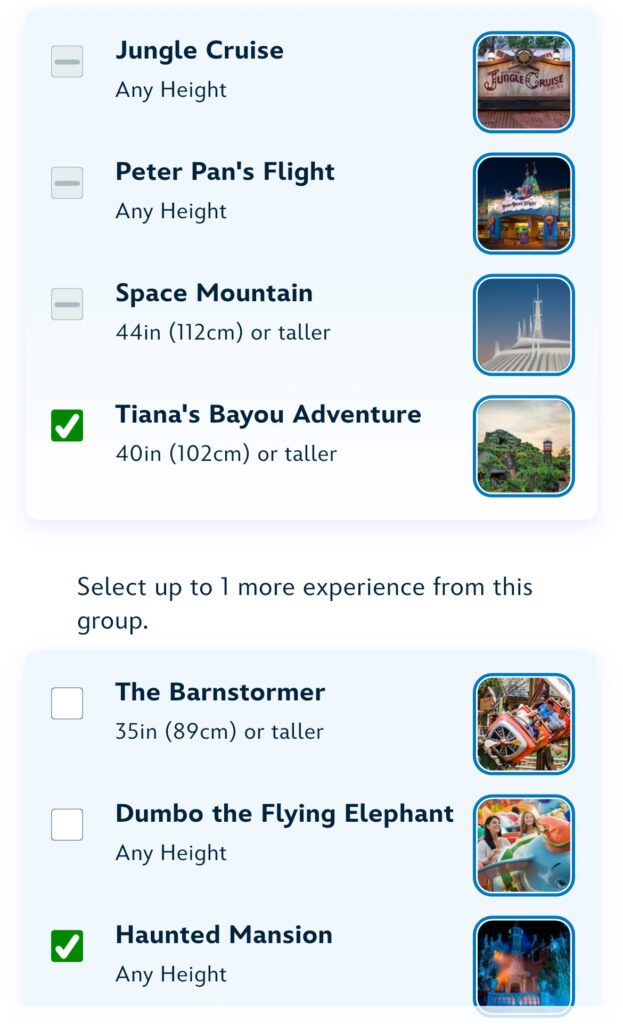
- Select one Tier 1 attraction and 2 Tier 2 attractions for your preselects (or you can choose all from Tier 2)
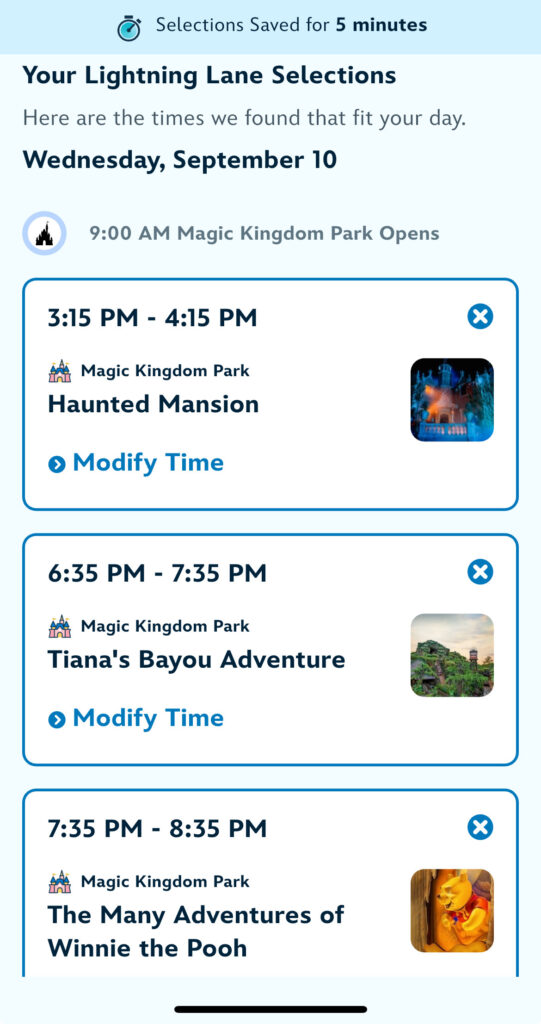
- Next, review the return times Disney has suggested for your party. You can modify at this time or scroll down to continue to purchase
Step 4: Confirm and Pay
- Multi Passes are bundled, while Single will have separate costs per ride.
- Pro Tip: Purchase Multi Pass first then go back and purchase Single Pass, especially if not everyone will be riding the same rides.
- Once confirmed, your return times will show up in the “My Plans” section of the app.
Step 5: Redeem at the Ride
- When it’s your time, head to the attraction and look for the Lightning Lane entrance.
- Scan your MagicBand, park ticket, or phone to enter, and enjoy skipping the standby line.
- Pro Tip: You can tap into your Lightning Lane up to 2 hours AFTER your return time. Knowing this will make your day a lot more flexible and laid back at the parks.
Best Lightning Lane Picks at Each Park
When booking your Lightning Lane pre-selections, Disney divides rides into Tier 1 and Tier 2 categories. Tier 1 rides are the most popular (and hardest to get), while Tier 2 rides are still great options but usually easier to snag. Here’s a park-by-park breakdown of what’s worth booking first.
Magic Kingdom
- Tier 1:
- Tiana’s Bayou Adventure
- Peter Pan’s Flight
- Tier 2:
- The Many Adventure of Winnie the Pooh
- Haunted Mansion
- Pirates of the Caribbean
- Pro Tip: Don’t book shows like Philharmagic with your Lightning Lane, you can easily walk into that show without any issues.
My family’s pick at Magic Kingdom is always Tiana’s Bayou for our Tier 1 and then Winnie the Pooh and Haunted Mansion for our Tier 2. We usually ride Space Mountain during early entry and head right over to Fantasyland after that!
EPCOT
- Tier 1:
- Test Track
- Remy’s Ratatouille Adventure
- Tier 2:
- Soarin’ Around the World
- The Sea’s with Nemo
- Pro Tip: Get return times as early in the day as you can, this allows you to tap into a ride and start booking your next Lightning Lane quicker!
My family’s pick at Epcot is going to be Test Track for Tier 1 (my boys LOVE this ride) and Soarin’ and Spaceship Earth for our Tier 1. I use Spaceship Earth as a burner ride and try to book it at park opening so I can open up my Lightning Lanes to snag Remy’s next!
Hollywood Studios
- Tier 1:
- Slinky Dog Dash
- Mickey & Minnie’s Runaway Railway
- Tier 2:
- Toy Story Mania
- Alien Swirling Saucers
- Pro Tip: Families with littles should prioritize Toy Story rides. Teens may prefer thrill rides like Tower of Terror and Millennium Falcon Smuggler’s Run.
My family’s pick at Hollywood is always the Toy Story rides. In an ideal world I would snag Slinky Dog, Toy Story Mania, and Alien Swirling Saucers as our preselects before lunch and use Early Entry to ride Mickey and Minnie’s Runaway Railway.
Animal Kingdom
- No tiers! So here is what I recommend:
- Na’vi River Journey
- Kilimanjaro Safaris
- Everest
- Pro Tip: Safaris are best early in the morning or late afternoon when animals are most active—so line this up with your schedule if you can.
My family loves to book Festival of the Lion King with a Lightning Lane so we get better seats. This is my favorite show at Disney World and I always kindly ask to be seated in the Lion section so my daughter can ROAR!
FAQs About Lightning Lanes at Disney World
Do you have to buy Lightning Lanes at Disney World?
Not always. The Lightning Lane Multi Pass is an optional upgrade, but for many families it’s worth it to save hours in line. If you don’t go to Disney World frequently, I highly recommend you add Lightning Lanes as a budget line for your trip. Using Lightning Lanes at Disney World really makes the trip more enjoyable!
What’s if we can’t use our Lightning Lane Single Pass?
Let’s say you bought a Single Pass for your group for TRON and now your child is way too scared to get on the ride. Or maybe they didn’t meet the height requirement. I recommend going to Guest Services (Blue Umbrellas all over the parks!) and asking for a refund or help. I’ve never had an issue getting help with an issue like this while at the parks.
How many Lightning Lanes can you book per day?
- With a Multi Pass, you can pre-book 3 rides per day.
- After you use a Lightning Lane while in the parks, you can book another Lightning Lane!
- Single Passes and Premier Passes can be bought separately as needed.
Do onsite guests get earlier access than offsite?
Yes! Onsite resort guests can book 7 days before check-in, while offsite guests book 3 days before their ticket start date. This is a big reason why many families choose to stay at a Disney hotel.
Can you use Lightning Lanes for character meet and greets?
Unfortunately no, Disney World removed Characters from Lightning Lanes and we still aren’t OK with this. I recommend trying to meet Characters in the morning or right before 5pm when waits are lower.
Which Lightning Lane should I book first?
It depends on the park, but generally the most popular rides sell out first:
- Magic Kingdom → Tiana’s Bayou or Peter Pan’s Flight
- EPCOT → Test Track or Remy’s
- Hollywood Studios → Slinky Dog Dash
- Animal Kingdom → Na’vi River Journey or Kilimanjaro Safaris
“Still feeling unsure about Lightning Lanes? That’s what I’m here for! As a travel planner that specializes in Disney, I’ll help you build a custom Lightning Lane strategy that keeps the magic (and saves your sanity).” Learn more here.
Wrapping Up: Making Lightning Lanes Work for Your Family
Disney World is all about the memories—not the stress. Lightning Lanes can feel overwhelming at first, but once you know the basics and have a plan, they become one of the best tools for maximizing your time in the parks. From pre-booking your top rides to knowing which attractions are worth the pass, a little strategy goes a long way toward happier kids (and parents!).
If you’re planning your first Disney trip—or just want to make this one easier than the last—you don’t have to figure it all out alone. As a travel planner who has helped hundreds of families plan Disney World vacations (and a mom who’s been in your shoes), I help families create custom park plans that take the guesswork out of Lightning Lanes, dining, and everything in between.
✨ Ready to make your Disney vacation stress-free and magical? [Work with me here] , and let’s start planning the trip your kids will remember forever. I’d also love to chat with you, you can schedule a 15 minute consult call with me right here.